Wall rendering in Hucknall
Wall rendering in Hucknall
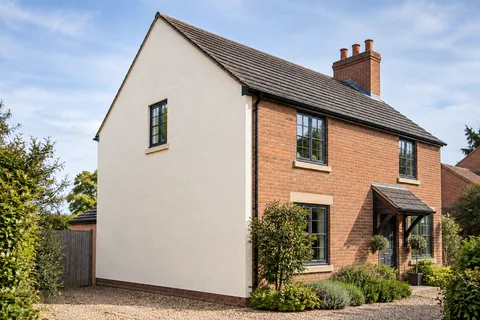
A single elevation deserves a complete specification of its own. The work may be confined to a gable or rear wall, yet it still has to meet the roof, openings, ground and neighbouring finishes properly. Name those edges at the survey so a limited project has a deliberate result rather than looking like an unfinished whole-house refurbishment.

On this page
Decide exactly which wall is changing
Mark the work on a photograph taken far enough back to include the surrounding building. Show whether the new finish returns around the corner or stops before the frontage. Include any short lengths hidden by a porch, side gate or adjoining roof. These boundaries matter when the intention is to improve one wall while protecting a recently finished or attractive neighbouring elevation.
For a gable, the roof edge can make access and finishing more involved than the ground-level width suggests. Identify obstacles such as a conservatory, lean-to or narrow passage before the access method is priced. A contractor should not have to infer the arrangement from a cropped image of the defect. Provide the full view and arrange inspection where the upper wall cannot be assessed safely from the ground.
If the wall is part of a new extension, make its construction information available. Old brick, new blocks and filled openings may require different preparation. The specification should describe the relevant background and the interface with the original building. A smooth final colour cannot tell you whether those concealed differences have been considered.
| Edge or feature | Decision to make |
|---|---|
| Corner to frontage | Where the new finish stops or returns |
| Roof line | Access and finished weathering detail |
| Door or window | Frame, reveal, sill or threshold interface |
| Side boundary | Available space and agreed access |
| Ground | Drainage and finish termination |
- Set the edges Decide where new render stops against brick, stone or an existing finish.
- Prepare the background Remove loose material, repair masonry and prepare suction and surface key. Existing paint needs a specified removal or alternative treatment.
- Base coat Built up to level the wall, with mesh where backgrounds change or crack.
- Finish Matched to the rest of the house or chosen as a deliberate contrast.
- Shed the water Copings, sills and the base bead keep rain off the top and away from the bottom edge.
The usual order of work. The survey and the chosen products decide the actual steps.
Retain sound surfaces on a clear basis
The existing covering should be assessed for condition and compatibility with the proposed work. Ask which areas can remain and why. Render repair may be sufficient where defects are limited and a suitable boundary can be formed. If the covering is extensively detached or otherwise unsuitable, replacement needs a defined removal and background-repair scope.
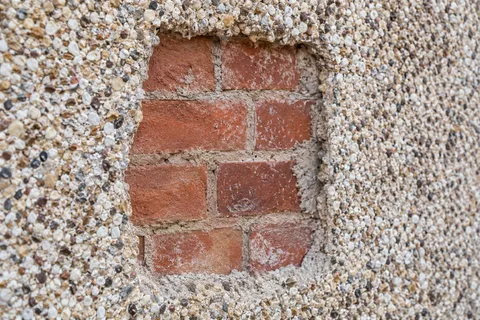
Pebbledash removal can be part of that preparation, but do not assume it will expose brick suitable to leave bare. The wall may contain earlier alterations or damaged masonry. Agree a trial where appropriate and retain photographs of the findings. If the actual condition differs from the assumptions, there should be a review before the replacement system is applied.
At the retained edge, define how the new work joins the old. The materials, movement and visual result all matter. A narrow feathered patch across an unsupported junction is not necessarily a suitable way to hide the change. Ask for a detail that reflects the actual system and choose a stopping point that can be inspected and maintained later.
Work around openings that will actually remain
New external doorways can change the wall more than expected. The opening needs a completed frame, threshold and weathering design, with the surrounding masonry made suitable for the finish. Confirm who performs each task. If the door contractor excludes external making good, put that work explicitly into the relevant package rather than assuming it is included in the rendering rate.
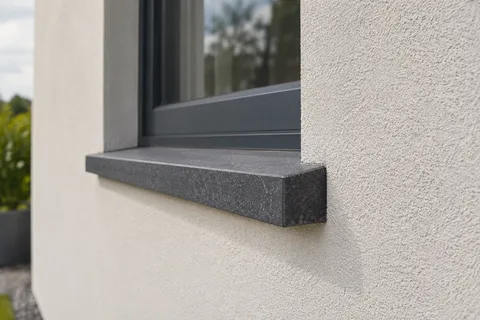
Existing windows also need sufficient sill and reveal details for the proposed build-up. Identify any that will be replaced soon and coordinate their timing. Finishing the wall before a planned frame removal can create avoidable patches. If windows remain, protect them during preparation and check that functional drainage or ventilation features are not covered by the new finish.
Movement joints must remain effective where required by the building and system design. A fine surface is not a reason to omit them. Review their visible position with the elevation and chosen finish. Reinforcement and joint details should be documented before application, particularly where a new opening changes the arrangement of a previously continuous wall.
Choose an appropriate surface, not just a shade
Silicone rendering and monocouche rendering differ in their texture and underlying specification. Compare samples beside the retained frontage or adjoining materials. Look at a dry sample from the normal approach to the building, as well as close up. Side lighting can make a texture more pronounced than it appears under flat indoor light or in a product photograph.
Lime rendering may suit compatible treatment of traditional masonry, subject to assessment. A wall with several generations of repairs needs particular attention to what can remain and how it meets the new material. Traditional sand-and-cement render may be another option on suitable construction. The written proposal should explain the background preparation and finish rather than relying on a material label as the entire specification.
If the existing render is sound and the change is only colour, render respray offers a separate route to consider. It needs adhesion and compatibility checks and may leave the existing texture visible. Comparing that option with replacement helps establish whether the desired result requires a new surface or a properly prepared coating over the one already there.
Check space, attachments and the base detail
External wall insulation changes the space outside the masonry. On a side elevation, establish the property boundary and access rights before assuming a thicker system can fit or be installed from neighbouring land. The design also needs to consider sills, eaves, service fittings and the foot of the wall. A narrow passage is a project constraint, not a reason to omit those details.
For render-only work, attachments still need attention. Downpipes, cables and lights can obstruct preparation and create awkward edges if left in place without a plan. Identify what is removed or repositioned and how it is reinstated. Fixings must suit the completed construction, especially if the build-up has changed from the original arrangement.
At ground level, coordinate the finish with the existing drainage and damp-control details. Do not extend material below the specified termination merely to hide an uneven paving line. If landscaping is also planned, share the final levels with the designer before the base is completed. Later changes to ground levels can affect a detail that was appropriate when the rendering was installed.
Finish with a record of this particular wall
Inspect the elevation and its retained neighbours while access is available. Check the roof edge, opening details, work boundaries and reinstated fittings against the specification. Record any accepted visual difference at a repair or joint. The result should be assessed against an agreed scope rather than a vague expectation that the entire house now looks newly finished.
Keep the product, texture and colour references with photographs identifying the wall. If the frontage is refurbished later, those records help the next contractor design the adjoining work. They also make it easier to select compatible maintenance or repairs without assuming that every rendered surface on the property uses the same system.
Common questions
Does the new finish have to return around the corner?
The appropriate edge depends on the existing material, system and corner condition. Agree it in the design and show the boundary on a photograph. A return should not be added casually to hide an unfinished edge, and stopping at the corner should not be assumed suitable without considering the actual detail.
See housing and planning information for Hucknall and nearby places, including the source and geography behind each figure.