External wall insulation in Hucknall
External wall insulation in Hucknall
Insulating the outside of a wall takes space and changes its details. On a narrow side passage, the available width and boundary may be as important as the chosen insulation thickness. Start with a measured, coordinated design for the building, then select the supported system and finish that fit that design.

On this page
Establish the wall construction and project objective
A retrofit assessment should identify the existing wall and its condition, including previous repairs and unresolved moisture problems. Insulation should not conceal defects whose cause remains unknown. Ask what has been inspected, what information supports the design and which parts still need access or investigation. The scope should distinguish confirmed findings from assumptions that must be checked before installation.
The proposed system includes insulation, fixing, reinforcement, base coat and decorative finish. It also needs designed interfaces at openings and terminations. Comparing board thickness alone misses much of the project. Keep the complete specification together and ask how it applies to each elevation, particularly where the house contains different ages or types of construction.
Whole-house rendering may accompany insulation on some walls while other elevations receive a render-only finish. Identify the distinction in the drawings and quotation. A common colour does not mean the underlying systems are identical. The transition between them needs a detail and an agreed appearance, rather than an improvised step discovered during application.
| Location | Design question |
|---|---|
| Side boundary | Is the proposed position and access agreed? |
| Passage | Will the finished route remain usable? |
| Roof edge | Does the weathering detail suit the new face? |
| Opening | Are frame, reveal and sill coordinated? |
| Attachment | How is it supported and maintained? |
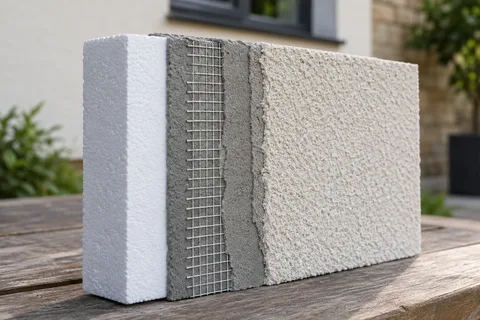
- Existing wall Prepared; fittings removed and the base track fixed above ground level.
- Insulation boards Bonded with adhesive and, in most systems, mechanically fixed to the wall.
- Basecoat with mesh Reinforcement mesh embedded across the board joints and around openings.
- Primer Where the system requires it.
- Finish render A thin-coat finish that weatherproofs the insulation.
Wall on the left, finish on the right. Not to scale: coats, thicknesses and primers follow the chosen manufacturer’s system and the condition of the wall.
Measure the space beside the building
Check the finished wall position relative to the property boundary and any shared passage. The existing masonry face is not automatically the legal limit of the available space. Establish the relevant ownership and access arrangements with appropriate advice where needed. Do not assume neighbouring land can be used permanently for a thicker wall or temporarily for installation because it makes the work easier.
Measure clear routes with the proposed build-up in place. Doors, gates, bins and everyday access may be affected in a narrow passage. The installation also needs working space that can be different from the final clearance. Include both conditions in the plan. A finished design that physically fits can still be difficult to construct without an agreed access method.
If the available space changes the proposed scope, refer that back to the designer. Omitting a layer or altering the system casually to gain a little width is not a sound resolution. The design may need a different approach or a clearly detailed boundary between treated and untreated areas. Record the resulting specification before ordering materials.
Resolve roof edges and openings together
The outside face moves towards the edge of existing eaves and verges. Show the completed section and identify any roof alteration required to maintain the intended weathering arrangement. The roof contractor and system installer need the same detail. A narrow existing overhang should not be assumed adequate merely because insulation can be fixed below it.
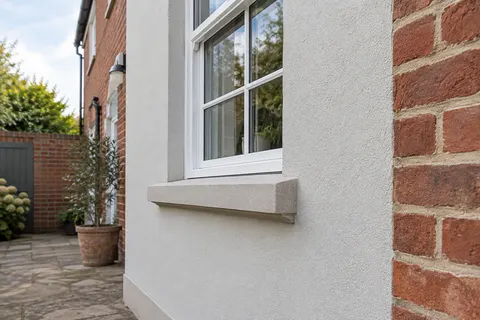
Window sills, reveals and door thresholds also need coordinated details. A new external doorway may be part of the wider renovation, so settle its position and installation sequence early. The frame and insulation should not be designed independently and forced together at the last stage. Keep drainage, ventilation and other functional openings effective in the completed arrangement.
Where existing windows remain, assess their suitability and likely future replacement needs. Replacing them soon after insulation can disturb several completed layers. That does not mean every retrofit requires new windows, but the choice should be made knowingly. Include the relevant opening records in the handover so a later alteration has a clear starting point.
Prepare the existing surface on evidence
The system needs a suitable background and fixing design. Old render, paint and patches should be assessed rather than automatically retained or stripped. Ask for the basis of the decision and any required tests or trials. An apparently neat surface may still conceal a weak layer, while sound material may be retainable under an appropriate supported specification.
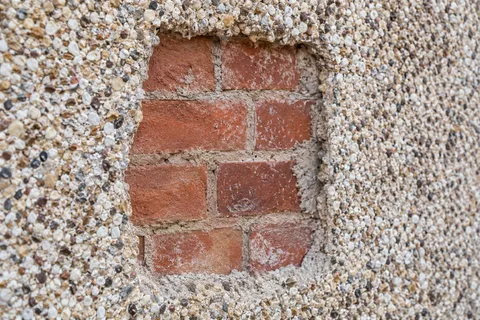
Pebbledash removal can expose different masonry or earlier alterations. Inspect those findings before continuing and update the design where necessary. Render repair may form part of preparing a retained background, with materials and curing appropriate to the subsequent system. Keep the opened-wall photographs and acceptance records so the concealed construction is documented.
Leaking gutters and other sources of avoidable wetting need correction. Assign that work and its timing rather than leaving it outside the insulation contract with no owner. The new system should not be expected to compensate for a faulty roof-water detail above it. Coordinate associated repairs before they become difficult to reach without disturbing the finish.
Design attachments and future access
List pipes, cables, lights, signs and other fittings on the affected elevations. Decide which move and how each is supported through or outside the new build-up. A longer screw is not a complete fixing specification. The detail needs to suit the attachment, underlying structure and insulation system, with relevant advice where required.
Keep maintenance access practical. A downpipe bracket hidden behind an awkward return or a service fitting trapped by the new face can make later work unnecessarily disruptive. Discuss these items during the measured survey. The project should leave a usable building, not simply a continuous decorative surface around fittings that can no longer be serviced sensibly.
Commercial rendering projects may add signs, security equipment and entrances that remain in use. Coordinate the installation phases with the building manager. At a house, the equivalent issues may be a doorbell, exterior light or side gate. Small attachments deserve clear details because they often return after the main facade contractor has finished.
Inspect the system before the finish conceals it
Agree relevant checks of the background, fixings, reinforcement and junctions under the selected system. Assign responsibility for accepting those stages and keep records with locations and dates. Photographs support the inspection when they show where the detail belongs; an unlabeled close-up is less useful for understanding the completed building.
Silicone rendering may form the final decorative surface within a supported system. Approve its colour and texture separately from the concealed-stage checks. At handover, retain the complete specification and maintenance guidance, including treatment of damage and later attachments. INCA's care guidance is useful context for why repairs to insulated facades need to consider more than the visible outer coat.
Common questions
Is temporary access permission the same as agreement to a thicker wall?
They are different matters. Establish the relevant boundary position and arrangements for both the permanent design and the installation access. Where rights or ownership are uncertain, obtain appropriate advice before proceeding. The system design should use confirmed information and a workable site arrangement rather than assume neighbouring space is available.
See housing and planning information for Hucknall and nearby places, including the source and geography behind each figure.