Monocouche rendering in Hucknall
Monocouche rendering in Hucknall
Monocouche is a mineral render family commonly used for a coloured, scraped surface. It can suit an agreed whole elevation or a new wall, but the background and detailing still determine the specification. Treat the one-coat name as a product description, not a promise that every existing wall needs no preparation or that all stages happen in one visit.

On this page
Compare the mineral surface at a useful scale
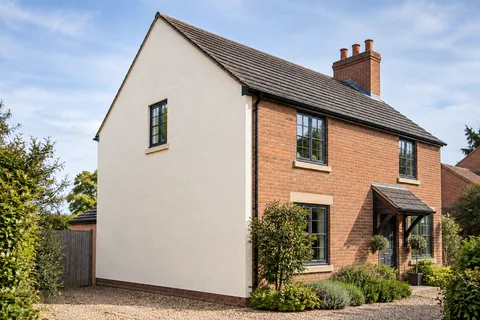
A scraped texture can look different close up and from the pavement. Review a representative dry sample beside the roof, joinery and retained masonry. Check it in side light as well as softer daylight. If a broad gable is the main work area, the surface may read differently from a small recessed wall, even when the same product and colour are used.
Keep texture and colour approval together. A colour reference alone does not describe the finish, and a photograph cannot reliably preserve the shade under all lighting and screen conditions. Ask the sample to demonstrate the proposed material and application. If it includes a corner or edge, record whether that detail is part of the approval too.
Silicone rendering offers a different textured option and build-up. Compare both for the same wall and agreed result. A brochure image of one system and an unfinished site sample of the other are not an even comparison. Include background preparation, junctions and care requirements so the decision is about complete proposals rather than isolated appearance claims.
| Subject | Confirm |
|---|---|
| Appearance | Dry colour and scraped texture sample |
| Background | Suitable masonry and retained layers |
| Preparation | Removal, repairs and readiness |
| Joints | Required movement and planned stopping points |
| Completion | Protection, fittings and maintenance records |
- Background Usually blockwork or brick; uneven or mixed walls may need a levelling coat.
- Beads and mesh Beads at corners, reveals and the base; mesh over junctions and lintels.
- Monocouche passes One through-coloured material, applied in passes to the specified thickness.
- Scraped surface Scraped once partly set, which removes the skin and leaves the texture.
Wall on the left, finish on the right. Not to scale: coats, thicknesses and primers follow the chosen manufacturer’s system and the condition of the wall.
Establish the background before selecting the build-up
New masonry needs to be suitable for the chosen render specification. Provide construction information and identify different blocks, filled chases or repairs. The system guidance may require particular preparation and readiness conditions. Do not substitute a universal waiting period or a simple dry-to-touch check for assessment of the actual background and selected material.
An existing elevation can be more complicated. Retained paint, old render and repair patches need evaluation for soundness and compatibility. The contractor should explain which layers remain and which are removed. If the proposal assumes the old covering is suitable, ask how that will be confirmed before the new material depends on it.
Wall rendering describes the complete elevation scope, including the perimeter. The monocouche specification should sit within that scope rather than replace it. A material name does not answer where the finish stops beside a doorway, how it meets the roof edge or what happens at the ground. Those are part of the finished wall and should be shown before application.
Plan removal and repairs as separate operations
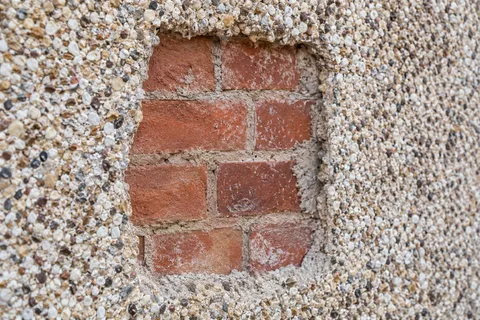
Pebbledash removal may be required where the existing covering is unsuitable or a different surface is wanted. A limited trial can help establish its bond and the effect of removal on the masonry. Record both the revealed condition and any damage caused by the method. A trial should inform the specification, not simply confirm that a tool can take the covering off.
Where local defects can be treated, render repair needs compatible materials and an appropriate edge to sound retained work. The repair must reach the condition required for subsequent layers. A patch made immediately before application may need additional time or assessment. Keep that sequence in the programme rather than assuming all preparation is complete once the surface looks level.
If older masonry calls for lime rendering, consider that specification on its own merits. A coloured mineral product is not automatically interchangeable with a traditional lime build-up. The choice should reflect the construction, retained materials and moisture behaviour. The surveyor or designer should explain the relevant compatibility instead of relying solely on the age or appearance of the house.
Keep the necessary joints visible in the design
Movement joints need to work through the finish where required. Reinforcement has a role in the specified system, but it does not make every junction between old and new construction suitable for continuous coverage. Mark the joints on the elevation and discuss their relationship to windows, corners and colour boundaries before the final appearance is approved.
A new external doorway can introduce fresh masonry and altered edges in an otherwise retained wall. Coordinate the opening detail and the render boundary with the door installation. The applicator should not be left to bridge an unfinished interface simply to make the texture continuous. The relevant design and substrate preparation need to be agreed first.
Application stopping points also need planning. An arbitrary break across a prominent face may remain visible. Coordinate access changes and phases with suitable panel boundaries and the chosen product's application requirements. If the programme has to change, review the effect on the finish rather than assuming the work can pause anywhere with no visual consequence.
Include weather protection and adjacent surfaces
The application and curing conditions should follow the manufacturer guidance and site assessment. Ask how the wall is protected if weather interrupts the planned sequence. The contractor may need to postpone a stage, and the temporary arrangement should keep the exposed or partly completed work suitable for continuation. A preferred date is not a substitute for acceptable conditions.
Protect windows, door furniture, paving and nearby materials during preparation and finishing. Identify items that need moving and who is responsible. Where a retained frontage adjoins a replaced gable, pay particular attention to the corner and cleaning method. The completed job should not improve one surface by damaging another that was meant to remain unchanged.
Coordinate downpipes and other attachments so the finish can be applied properly and fittings reinstated with suitable details. A bracket left in place without consideration can obstruct preparation or create an awkward edge. A bracket refitted after completion needs to suit the wall construction rather than simply being forced through the fresh surface.
Plan for maintenance and later changes
Keep the product, colour, texture and relevant installation records. A future patch may still be visible because the original material has weathered and application conditions differ. Discuss that limitation before accepting a very small repair on a prominent area. A larger panel treatment may be an alternative where compatible and proportionate to the problem.
Render respray may provide a later colour change on suitable sound material, but its preparation and coating compatibility need assessment. Do not apply an unrelated paint simply because it covers a stain. Check the cause of repeated wetting and follow the existing system's care guidance. The most useful handover records explain what is on the wall and how later work should take account of it.
Common questions
Will one colour reference match a later phase?
It provides useful information, but it does not eliminate differences caused by texture, application and weathering. Discuss phase boundaries and expected variation before starting. Retain the product and sample records, and review the later work against the actual existing surface rather than promising a match solely from the original colour name.
See housing and planning information for Hucknall and nearby places, including the source and geography behind each figure.